


You want to use Linux, but you are not ready to leave Windows behind. That is a very common situation. Developers, students, and system admins face it every day.
The good news? You do not have to choose between the two. Windows lets you run a full Linux environment right inside your existing system, with no virtual machine and no dual-boot setup required.
This guide shows you exactly how to install Linux on Windows using WSL (Windows Subsystem for Linux). You will learn what WSL is, why it matters, and how to get it running step by step.
Let's dive into the basics before moving to the hands-on steps.
What is WSL?
WSL stands for Windows Subsystem for Linux. It is a compatibility layer built into Windows 10 and Windows 11. It lets you run a Linux terminal and command-line tools directly inside Windows, without rebooting or switching systems.
Microsoft developed WSL to help developers work across both environments without friction. Instead of running a full virtual machine, WSL integrates Linux directly into your Windows session. It shares your file system, network, and hardware resources seamlessly.
WSL is used by software developers, data scientists, system administrators, students learning Linux commands, and anyone who needs Linux-based tools like bash scripting, Python environments, or package managers like apt. The result is a lightweight, fast, and practical Linux workspace that runs right alongside your Windows apps.
Key Features
-
WSL does not require VMware, VirtualBox, or any hypervisor. It runs Linux as a lightweight layer within Windows, resulting in faster startup and lower memory usage.
-
Once WSL is active, you can install tools like curl, git, wget, Python, Node.js, and hundreds of other Linux packages using apt or other package managers.
-
WSL lets you access your Windows files from Linux and your Linux files from Windows Explorer. You can move between both systems without copying or converting files.
-
You are not limited to one Linux version. WSL supports Ubuntu, Debian, Kali Linux, openSUSE, Fedora Remix, and more.
Step-by-Step Guide: How to Install Linux on Windows with WSL
-
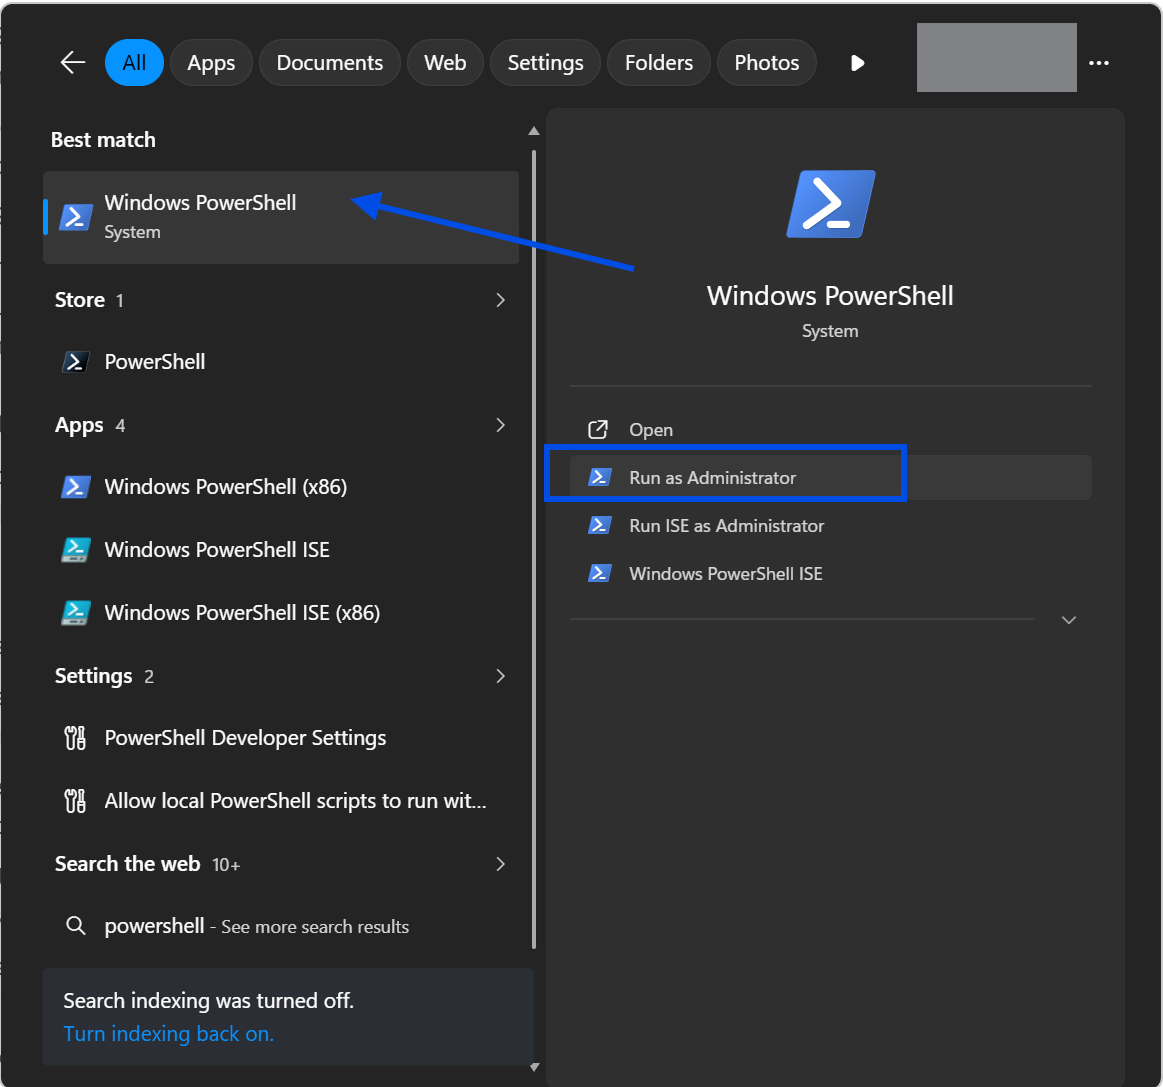
Open your Windows Start menu and search for "Windows PowerShell." Right-click it and select "Run as administrator." This gives you the permissions needed to enable system features.
-
In the PowerShell window, type the following command and press Enter:
wsl --install. This single command enables WSL, installs the Virtual Machine Platform, and downloads Ubuntu as the default Linux distribution. -
Wait for the installation to complete. The process downloads required components from Microsoft's servers. Your internet speed affects how long this takes.
-
Restart your computer when prompted. WSL requires a system restart to finish the setup. Save any open work before rebooting.
-
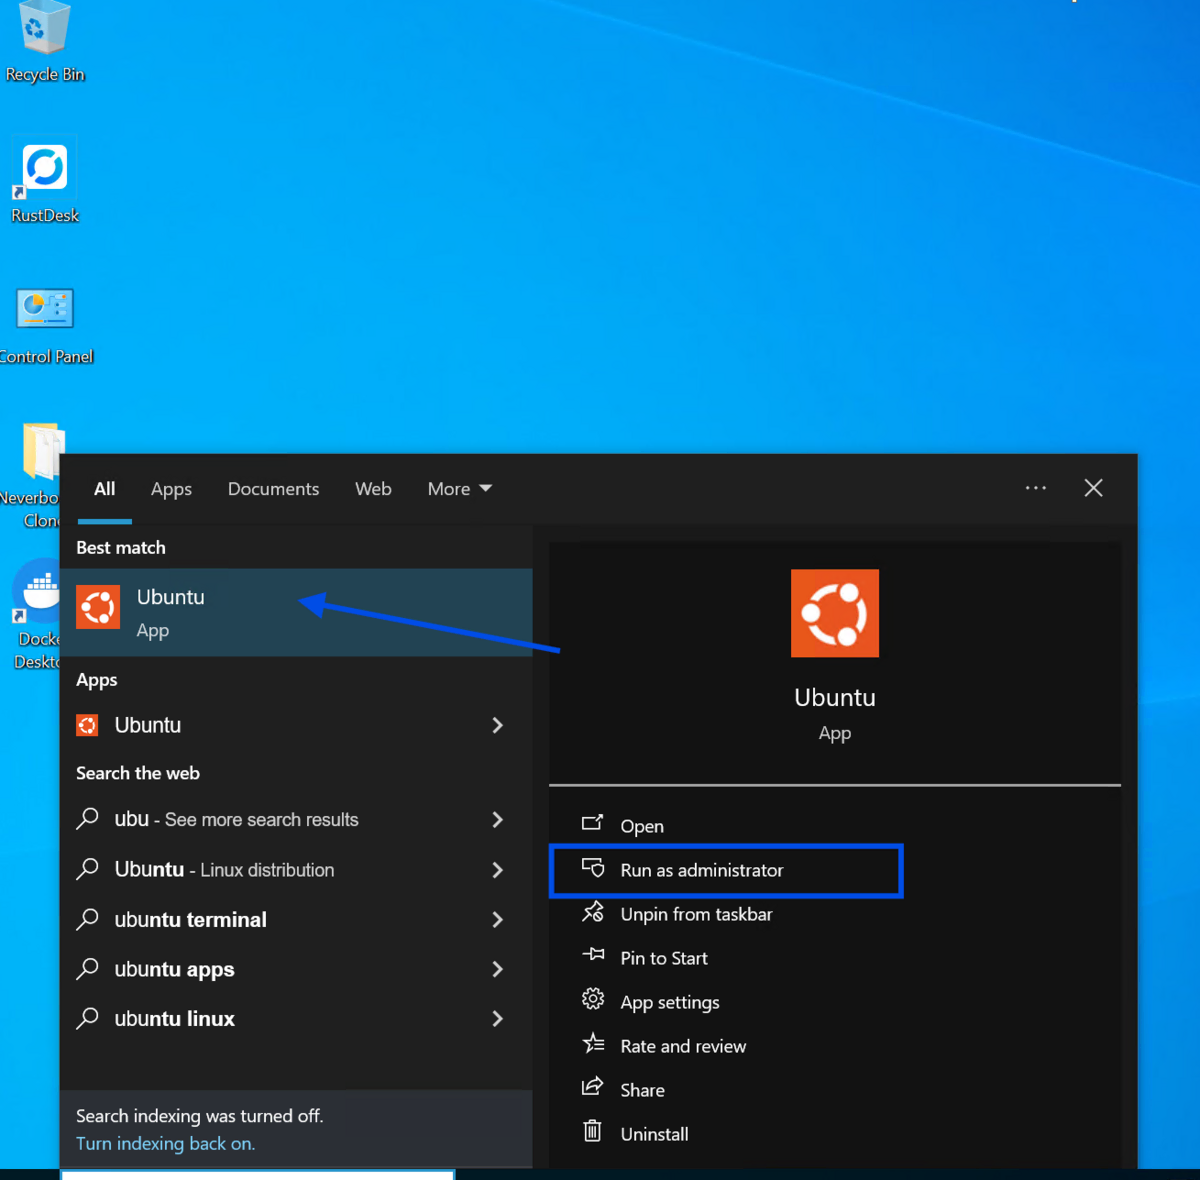
After restarting, Ubuntu launches automatically. If it does not, open it manually from the start menu by searching for "Ubuntu."
-
Wait for the initial Ubuntu setup to finish. You will see a message that says, "Installing, this may take a few minutes." Do not close the window during this step.
-
Create your Linux username when prompted. This is a separate account from your Windows login. Choose a simple, lowercase username.
-
Set a password for your Linux account. Note that Linux does not display characters as you type your password. That is normal behavior. Type carefully and press Enter.
-
Your Linux terminal is now ready. You should see a command prompt starting with your username. This confirms WSL is working correctly.
-
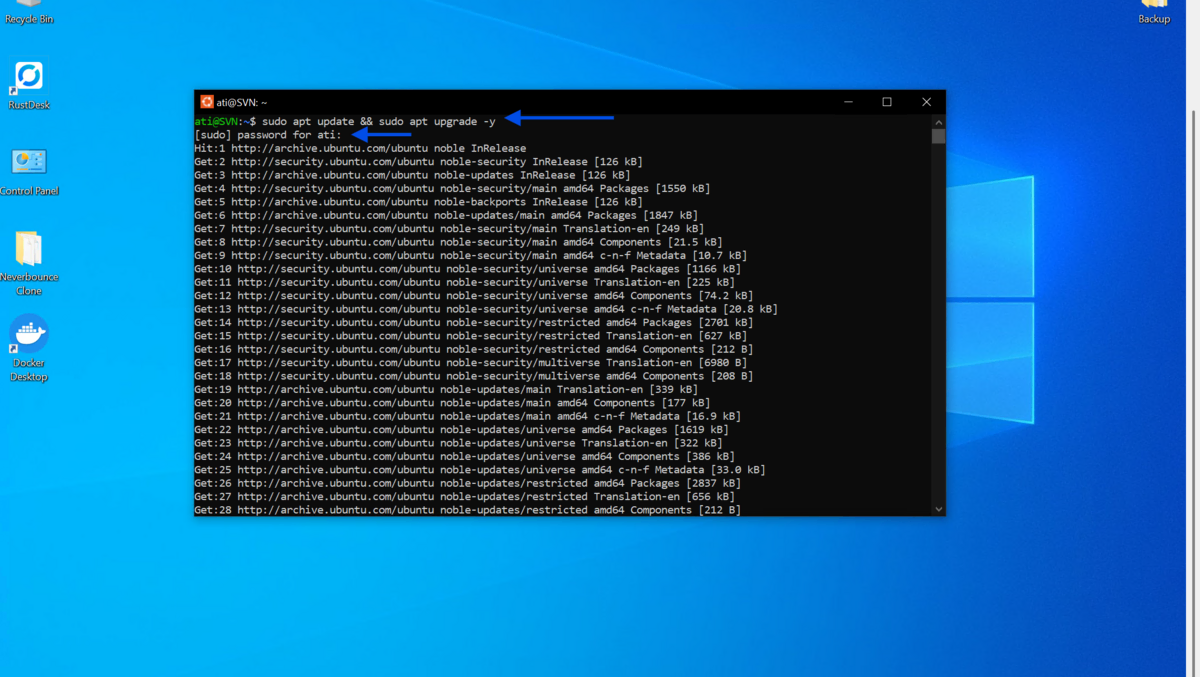
Update your Linux packages immediately by running:
sudo apt update && sudo apt upgrade -y. This pulls the latest security patches and software updates for your Ubuntu installation.
-
Install a Linux application to test your setup. For example, run
sudo apt install git -yto install Git. Once done, typegit --versionto confirm it is installed correctly. -
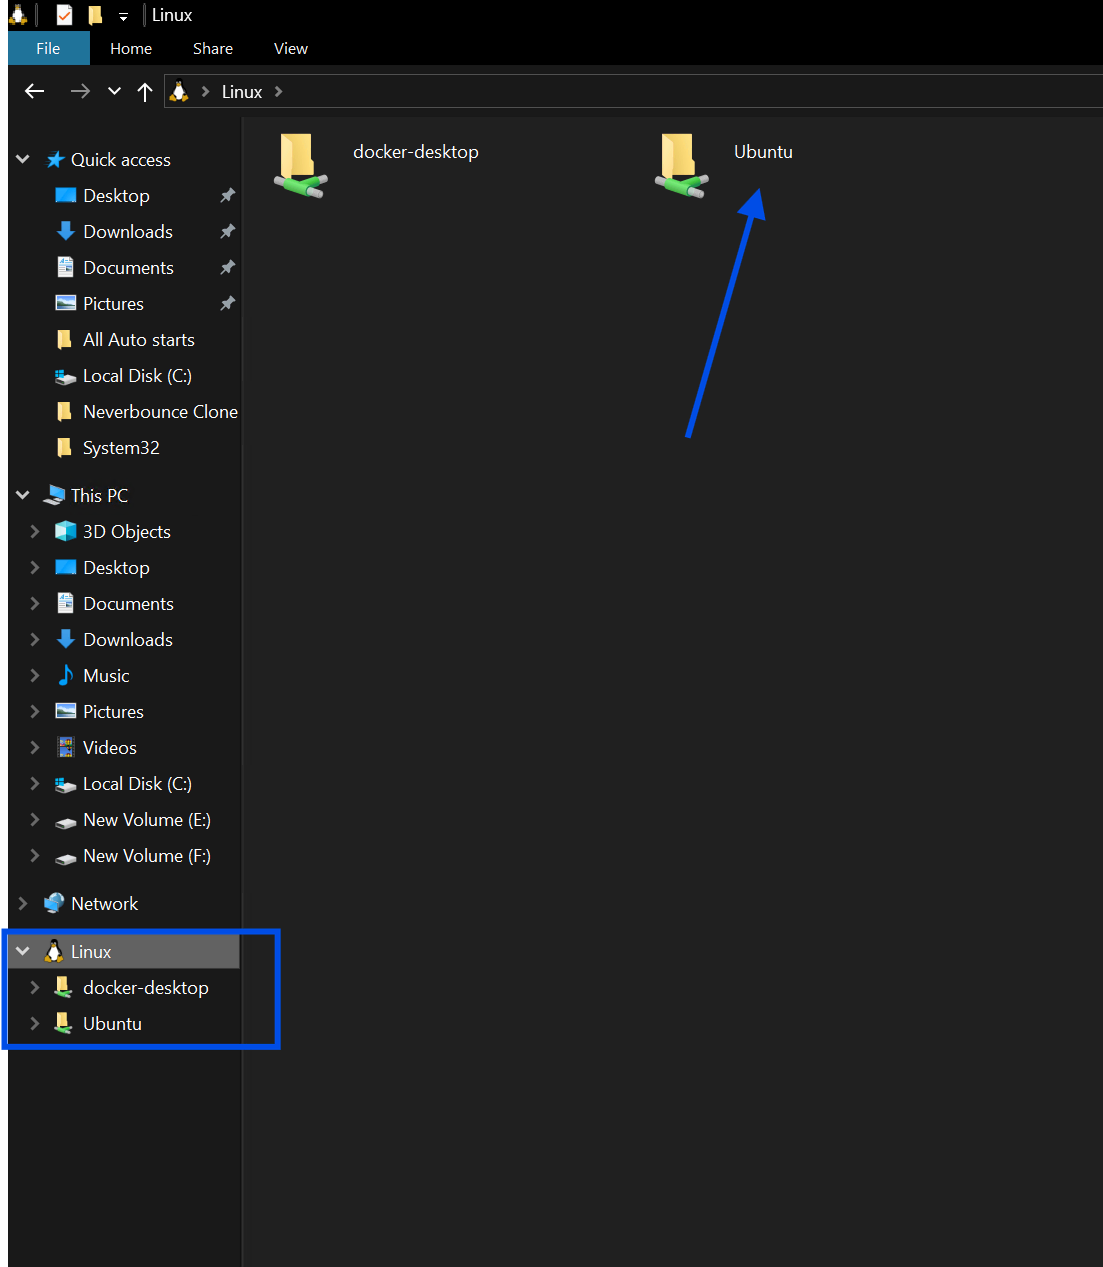
To switch between Windows and Linux files, type
explorer.exein your Linux terminal. This opens your current Linux folder directly in Windows File Explorer.
Quick Tips for Beginners and Advanced Users
-
Use
wsl --list --verbosein PowerShell to see all installed Linux distributions and check which version of WSL each one uses. -
If you want to install a specific Linux distro instead of Ubuntu, run
wsl --install -d Debianor replace "Debian" with the name of your preferred distribution. -
Pin your Linux terminal to the taskbar so you can open it faster without searching each time.
-
Use Windows Terminal for a better experience. It supports multiple tabs, custom themes, and lets you switch between PowerShell and Linux in one window.
Common Mistakes to Avoid
-
Many users try to open Linux before restarting. WSL will not work properly until Windows applies the necessary system changes after a reboot.
-
WSL 1 is older and slower. Always confirm you are running WSL 2 by checking with
wsl --list --verbose. If needed, upgrade withwsl --set-version Ubuntu 2. -
A fresh install is never fully up to date. Skipping the
apt updatestep leaves your system with outdated packages and potential security gaps. -
Windows paths use backslashes and drive letters like
C:\Users. Linux paths use forward slashes like/mnt/c/Users. Mixing them up causes errors in commands and scripts.
Pricing and Availability
WSL is completely free. It is a built-in feature of Windows 10 (version 2004 or later) and Windows 11. You do not need a paid subscription or a license to use it.
Ubuntu, Debian, Kali Linux, and other supported distributions are also free to download.
The only requirement is a 64-bit version of Windows with virtualization enabled in your BIOS. Most modern computers meet this requirement by default.
Final Verdict
WSL is one of the most practical tools Microsoft has ever shipped for developers and technical users. It removes the biggest barrier to using Linux: the fear of leaving Windows behind.
You get a real Linux terminal, real package managers, and real Linux tools, all without a second operating system or complicated setup. Whether you are learning Linux for the first time, running development environments, or managing servers, WSL fits directly into your existing Windows workflow.
If you work with code, data, or system administration in any way, WSL is worth setting up today. It takes less than ten minutes and changes how you work permanently.
FAQs
Does WSL slow down my Windows PC?
WSL is designed to be lightweight. It uses fewer resources than a traditional virtual machine. You may notice a small amount of RAM usage when Linux is running, but it does not significantly impact general Windows performance.
Can I run graphical Linux applications with WSL?
Yes. WSL 2 on Windows 11 supports GUI apps natively through WSLg (Windows Subsystem for Linux GUI). You can run Linux desktop applications like gedit, GIMP, or even web browsers without extra configuration.
What Linux distributions are available for WSL?
WSL supports Ubuntu, Debian, Kali Linux, openSUSE Leap, SUSE Linux Enterprise Server, Fedora Remix, and Oracle Linux. You can view all available options by running wsl --list --online in PowerShell.
Can I run WSL on Windows 10?
Yes. WSL is available on Windows 10 version 2004 (Build 19041) and later. Make sure your system is up to date by checking Windows Update before starting the installation.
How do I uninstall WSL or a Linux distribution?
To remove a specific distribution, go to Windows Settings, then Apps, find the Linux distro in your app list, and click Uninstall. To remove WSL itself, you can disable the Windows Subsystem for Linux feature from the Turn Windows Features On or Off menu in Control Panel.


BlazinGazette